Setting up an Intex pool offers a fun and refreshing way to enjoy the summer․ Start by reading the manual thoroughly to understand safety precautions and setup specifics․ Ensure the site is clear, level, and free from sharp objects to prevent liner damage․ Unpack and inventory all components, checking for completeness and any damage․ The pump and filter system, crucial for water cleanliness, should be installed and tested according to instructions․ Inflate the top ring carefully to avoid damage․ Fill the pool gradually, then test the pump and filter to ensure proper function․ Regular maintenance, including cleaning and monitoring water chemistry, is essential for safety and longevity․ Address any issues promptly, and winterize the pool by draining and storing equipment properly for seasonal care․
Why Choose Intex Pools
Intex pools are a popular choice for their affordability, ease of setup, and versatility in size options․ They offer a cost-effective solution for families seeking a fun and refreshing way to enjoy the summer․ Known for their durability and safety features, Intex pools are designed to provide years of enjoyment with proper care․ Their quick assembly and disassembly make them ideal for seasonal use, while the included accessories like pumps and filters simplify the setup process․
Preparation Before Setup
Before setting up your Intex pool, ensure the area is clear of debris, sharp objects, and obstructions․ Check for level ground to prevent water imbalance and liner stress․ Gather all components from the box and verify against the inventory list to ensure nothing is missing or damaged․ Plan for adequate space around the pool for safe access and operation․ Proper preparation ensures a smooth and successful installation, minimizing the risk of issues during setup and future use․

Preparing the Site for Installation
Clear the area of debris and obstructions, ensuring the ground is level and smooth․ Remove sharp objects to prevent liner damage and ensure proper water distribution․
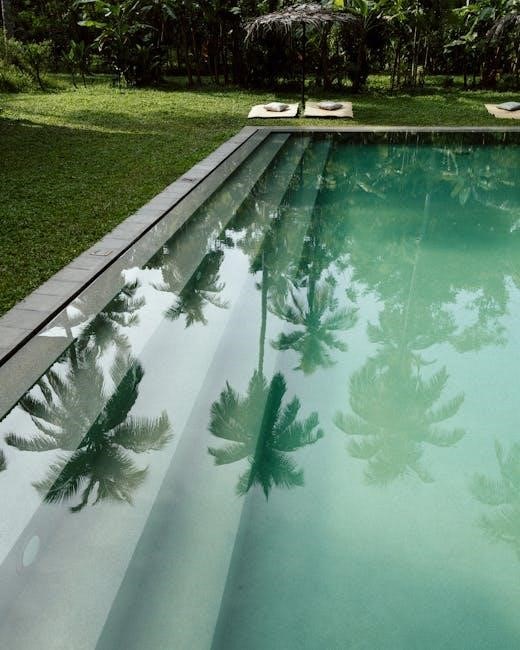
Choosing the Right Location
Selecting the right location for your Intex pool is crucial․ Opt for a flat, elevated area to prevent water accumulation and ensure proper drainage․ Avoid placing the pool under trees to minimize leaf debris․ Choose a spot with sufficient sunlight to maintain optimal water temperature․ Ensure the location is accessible for maintenance and far from power lines or overhead obstacles․ A level surface is essential for stability, so avoid low-lying areas that could collect water or cause uneven ground․
Clearing the Area
Clearing the area is essential before setting up your Intex pool․ Remove rocks, sticks, and grass to ensure a smooth surface․ Check for underground utilities and avoid obstructions․ Sweep away debris and level uneven ground to prevent liner damage․ Use a garden rake to create an even surface․ Ensure the area is free from sharp objects to avoid punctures․ This step ensures a safe and stable setup for your pool, preventing future issues during use․
Ensuring a Level Surface
Ensuring a level surface is critical for proper Intex pool installation․ Use a spirit level to check the ground and mark uneven areas․ Dig or fill low spots with sand to create a stable base․ Compact the sand firmly to prevent shifting․ A level surface prevents liner stretching and ensures even water distribution․ Double-check the area with a level before proceeding to guarantee a safe and functional setup for your pool․
Unpacking and Inventory
Carefully unpack all components, including the pool liner, pump, and frame․ Check each item against the inventory list to ensure completeness and inspect for damage before proceeding․

Understanding the Components
Familiarize yourself with the pool components, including the liner, frame, pump, filter, and top ring․ The liner holds water, while the frame provides structural support․ The pump and filter system circulates and cleans water, ensuring clarity and safety․ The top ring inflates to secure the liner in place․ Each part plays a vital role in the pool’s functionality․ Refer to the manual for specific details on your model to ensure proper assembly and operation․
Checking for Damages
Before starting the setup, inspect all components for any signs of damage․ Check the pool liner for punctures or tears, and ensure the frame and top ring are undamaged․ Examine the pump and filter for any cracks or defects․ Verify that all connectors and valves are intact and functioning properly․ Address any issues immediately to prevent leaks or malfunctions during use․ This step ensures a safe and successful pool setup․

Setting Up the Pool
Position the liner carefully, smooth wrinkles, and inflate the top ring; Install the pump and filter system as instructed․ Fill the pool gradually, testing components as you go․
Positioning the Pool Liner
Gently place the pool liner in the center of the prepared site, ensuring it is symmetrical and evenly spread․ Smooth out wrinkles by hand, working from the center outward․ Avoid dragging the liner to prevent tears․ Once the pool is partially filled with water (about 4-6 inches), carefully walk on the liner to remove any remaining wrinkles, starting from the center and moving toward the edges․ Never use sharp objects to remove wrinkles, as this could damage the liner․
Installing the Pump and Filter
Install the pump and filter system according to the user manual to ensure proper water circulation․ Connect the hoses securely to the pool and pump, making sure all fittings are tight․ Place the pump on a level, stable surface near the pool․ Plug in the pump and allow it to run for a few minutes to test for leaks or unusual noises․ Refer to the manual for specific operating instructions and ensure the system operates continuously to maintain clean water;
Inflating the Top Ring

Inflating the top ring is crucial for maintaining the pool’s structure․ Use an electric pump for efficiency, ensuring the ring is firm but not over-inflated․ Avoid stretching or bending the ring during inflation․ Once fully inflated, check for any leaks or weak spots․ A properly inflated top ring ensures the pool remains stable and secure, providing a safe and enjoyable swimming experience․ Regularly inspect and maintain the top ring to prevent damage and ensure longevity․

Filling and Testing the Pool

Filling the pool with water is straightforward, but ensure the pump and filter system are tested for proper function․ Avoid overfilling, and check for leaks or issues before use․
Filling the Pool with Water
Start by ensuring the pool is properly positioned and secured․ Use a garden hose to fill the pool slowly, avoiding overfilling․ Place the hose in the center to prevent wrinkles․ As water fills, the top ring will inflate naturally․ Stop occasionally to smooth out wrinkles by gently walking around the pool edge․ Once filled, check for leaks or tears․ Finally, ensure the pump and filter system operates correctly to maintain clean, safe water for swimming․
Testing the Pump and Filter System
After filling the pool, turn on the pump and filter system to ensure proper operation․ Check for leaks around connections and hoses․ Verify that water flows smoothly through the filter and returns clean to the pool․ Monitor the system during initial cycles to ensure it runs quietly and efficiently․ Adjust settings as needed to maintain optimal water circulation and filtration․ Refer to the pump manual for specific operating instructions and recommended runtime to achieve at least one complete water turnover daily․
Maintenance and Safety Tips
Regular cleaning and skimming are essential for hygiene․ Test and adjust water chemistry to ensure safety and clarity․ Always supervise children and inspect equipment for damage․ Address issues promptly to prevent larger problems and ensure a safe, enjoyable swimming experience․

Regular Cleaning and Skimming
Regular cleaning and skimming are crucial for maintaining your Intex pool’s hygiene and water clarity․ Use a skimmer daily to remove floating debris, preventing it from sinking and causing contamination․ Clean the pool floor with a vacuum at least once a week, and empty the skimmer basket frequently to ensure the pump operates efficiently․ Additionally, manually remove visible dirt and leaves to keep the pool pristine and prevent algae growth․ Consistent maintenance ensures safe and enjoyable swimming conditions․
Monitoring Water Chemistry
Monitoring water chemistry is essential for maintaining a safe and clean Intex pool environment․ Regularly test pH, chlorine, and alkalinity levels using a test kit․ Aim for a pH range of 7․2-7․8 and chlorine levels between 1-3 ppm․ Imbalanced chemistry can cause eye irritation, equipment damage, or algae growth․ Adjust chemicals as needed and always follow the manufacturer’s instructions for adding treatments․ Proper water chemistry ensures a healthy and enjoyable swimming experience for everyone․
Ensuring Safe Usage
Ensuring safe usage of your Intex pool is crucial for a fun and hazard-free experience․ Always supervise children and weak swimmers, as pool barriers are not a substitute for adult supervision․ Ensure the pool ladder is securely attached and use non-slip mats around the area․ Avoid swimming during thunderstorms or at night without proper lighting․ Teach swimmers to enter and exit the pool safely and prohibit diving or rough play․ Regularly inspect the pool and equipment for potential hazards to maintain a safe environment for all users․

Troubleshooting Common Issues
Identify leaks or tears promptly and patch them using repair kits․ Address pump malfunctions by checking connections and consulting the manual․ Resolve error codes like E09 by troubleshooting the system․
Addressing Leaks or Tears
Identify leaks or tears in the pool liner promptly to prevent further damage․ Turn off the pump and drain water to the level below the tear․ Clean and dry the area thoroughly․ Use a patch kit specifically designed for Intex pools, applying the adhesive carefully․ Allow the patch to dry completely before refilling the pool․ Regular inspections and quick repairs can extend the pool’s lifespan and ensure safe usage․ Always follow the manufacturer’s repair instructions for best results․

Resolving Pump Malfunctions
If the pump malfunctions, start by turning it off and unplugging it․ Check for blockages in the intake or outlet valves and ensure all connections are secure․ Verify the water level is adequate, as low water can cause issues․ Consult the user manual for troubleshooting specific error codes, such as E09․ If the problem persists, contact Intex customer support or consider replacing faulty parts․ Regular maintenance and inspections can help prevent future malfunctions and ensure smooth operation․
Winterization and Storage
Drain and clean the pool thoroughly, ensuring the top ring is properly deflated․ Store the pool and accessories in a dry, protected area to prevent damage and mold․
Draining and Cleaning the Pool
Drain the pool completely using the pump and drainage kit provided․ Disconnect all equipment and clean the pool liner with a soft brush and mild detergent to remove dirt and algae․ Rinse thoroughly and sanitize the liner with a diluted chlorine solution to prevent mold growth․ Ensure all parts are dry before storage to prevent damage․ Proper cleaning ensures the pool remains in good condition for future use․
Storing the Pool Equipment
After draining and cleaning, store the pool equipment in a dry, cool place protected from direct sunlight and moisture․ Use storage bags for the pump, filter, and ladder to keep them organized and dust-free․ Ensure all parts are completely dry to prevent mold and rust․ Avoid stacking heavy items on the equipment․ Proper storage extends the lifespan of your Intex pool components and ensures they remain in good condition for future use․