Welcome to the Lil Sew and Sew Instruction Manual! This guide is designed to help you master your sewing machine, from basic setup to advanced techniques.
Overview of the Lil Sew and Sew Machine
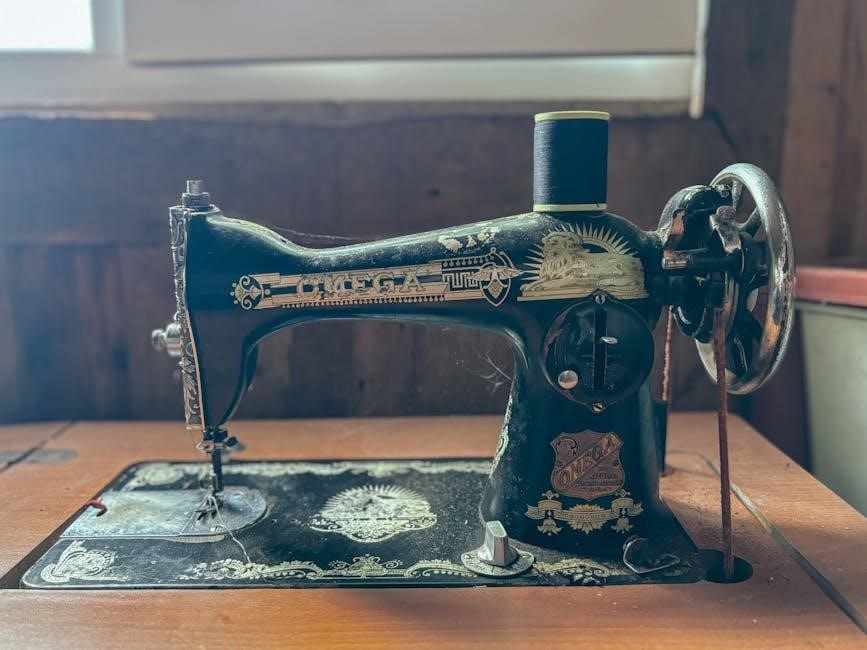
The Lil Sew and Sew Machine is a versatile and user-friendly sewing machine designed for both beginners and experienced sewists. It offers a range of features that make sewing efficient and enjoyable. With its compact design, it is perfect for small spaces while still delivering professional-grade results. The machine supports various fabric types, including delicate materials like jersey knits, and comes with multiple stitch options for decorative and functional sewing. Its intuitive controls and durable construction ensure a seamless sewing experience. Whether you’re working on simple repairs or creating complex projects, the Lil Sew and Sew Machine is a reliable companion for all your sewing needs.
Importance of Reading the Manual
Reading the Lil Sew and Sew Instruction Manual is essential to unlock the full potential of your sewing machine. It provides detailed guidance on understanding the machine’s features, troubleshooting common issues, and maintaining proper functionality. By following the manual, you can avoid errors, ensure safety, and achieve professional-grade results. The manual also offers tips for optimizing performance and addresses frequently asked questions. Whether you’re a novice or an experienced sewer, the manual serves as a comprehensive resource to help you navigate every aspect of your sewing journey. Taking the time to read and understand the manual will enhance your sewing experience and extend the life of your machine.
Key Features of the Lil Sew and Sew Machine
The Lil Sew and Sew Machine offers a variety of features designed to enhance your sewing experience. It includes multiple stitch options, adjustable stitch length and width, and a user-friendly interface. The machine is lightweight and portable, making it easy to take to sewing classes or work on projects anywhere. It also comes with a built-in needle threader, automatic tension control, and a free-arm design for sewing cuffs and hemlines. Additional features include abobbin winding system and a variety of included accessories such as different presser feet and needles. These features make the Lil Sew and Sew Machine versatile and suitable for both beginners and experienced sewers.

Setting Up Your Lil Sew and Sew Machine
Setting up your Lil Sew and Sew Machine involves unpacking, inspecting, threading, winding the bobbin, and powering it on. Follow these steps for smooth operation.
Unpacking and Initial Inspection
Unpacking your Lil Sew and Sew Machine is an exciting first step! Carefully remove the machine from its box and inspect for any visible damage or defects. Ensure all accessories, such as the bobbin, needles, and power cord, are included. Gently wipe down the machine with a soft cloth to remove any dust or packaging residue. Place the machine on a stable, flat surface and plug in the power cord. Before turning it on, double-check that all components are accounted for and properly stored. This initial inspection ensures your machine is ready for safe and efficient use. Refer to the manual for specific unpacking instructions and troubleshooting tips if needed.
Threading the Machine
Threading your Lil Sew and Sew Machine is a straightforward process that ensures smooth sewing operations. Begin by turning off the machine and locating the spool pin. Gently pull the thread from the spool and guide it through the tension discs, leaving a small loop. Next, pass the thread through the take-up lever and then through the needle’s eye. Pull the thread gently to remove any slack and ensure it is properly seated. Avoid twisting or pulling too tightly, as this can cause misalignment. Use high-quality thread and refer to your manual for specific threading diagrams. Proper threading is essential for preventing thread breakage and ensuring even stitches. Always double-check your work before starting a project and avoid using damaged or low-quality threads, as they can lead to inconsistencies. By following these steps carefully, you’ll achieve professional results every time. This foundational step is crucial for both beginners and experienced sewists alike, ensuring your machine operates at its best and your projects turn out flawless. Remember, patience and attention to detail are key to mastering this essential skill, which will serve as the cornerstone for all your future sewing endeavors.
Winding and Installing the Bobbin
Winding and installing the bobbin correctly is crucial for smooth stitching on your Lil Sew and Sew Machine. Start by cutting a length of thread, then place it on the spool pin. Hold the thread lightly and press the foot pedal to wind the bobbin evenly. Avoid overfilling, as this can cause jams. Once wound, trim the excess thread and remove the bobbin from the winder. Insert the bobbin into the bobbin case, ensuring it sits snugly and the thread feeds smoothly. Pull gently to secure the thread in place. If the bobbin doesn’t spin freely, check for tangles or improper winding. Properly wound and installed bobbins prevent thread breakage and ensure consistent tension, leading to professional-quality stitches. Always use the same thread for both the bobbin and the main spool to maintain consistency and prevent issues during sewing. This step is vital for achieving the best results in all your projects, ensuring that every stitch is even and secure. By following these simple guidelines, you can avoid common sewing frustrations and enjoy a seamless sewing experience. Regularly checking and maintaining your bobbin will extend the life of your machine and enhance your overall sewing performance, making it an essential habit for every sewist.
Powering On the Machine
To power on your Lil Sew and Sew Machine, locate the power switch, typically found on the base or near the handwheel. Ensure the machine is properly plugged into a working electrical outlet. Press the power button firmly until the machine lights up or makes a gentle humming noise. Some models may have an LED indicator that illuminates when the machine is powered on. Always ensure the power cord is undamaged and securely connected to both the machine and the outlet. For safety, tie back long hair and avoid loose clothing that could get caught. Once powered on, test the machine by gently turning the handwheel to ensure it operates smoothly. If the machine does not turn on, check the power cord and outlet or consult the troubleshooting section. Proper power-up ensures all features function correctly, making your sewing experience efficient and enjoyable. Regularly inspecting the power cord and connections helps prevent unexpected issues. By following these steps, you can confidently begin your sewing projects. Always remember to turn off the machine when not in use to conserve energy and prolong its lifespan. This simple process is the first step to unlocking the full potential of your Lil Sew and Sew Machine.

Basic Sewing Operations
Master essential sewing skills with the Lil Sew and Sew Machine, including straight stitching, backstitching, and basic fabric handling. Learn to thread, wind bobbins, and start your first project confidently. Troubleshoot common issues and adjust stitches for perfect results every time. This section guides you through the fundamentals of sewing, ensuring a smooth and enjoyable experience with your machine.
Understanding the Stitch Selection
The Lil Sew and Sew Machine offers a variety of stitches to suit different sewing needs. From basic straight stitches to decorative patterns, each stitch serves a specific purpose. The machine includes options like zigzag for stretchy fabrics, blind hem for invisible seams, and decorative stitches for embellishments. Understanding the stitch selection allows you to choose the right stitch for your project, ensuring professional-looking results. Always refer to the stitch chart provided in the manual for guidance. Experimenting with different stitches on scrap fabric can help you master their applications. Proper stitch selection enhances the quality and durability of your sewing projects, making it a crucial skill for both beginners and experienced sewists alike.
Adjusting Stitch Length and Width
Adjusting the stitch length and width on your Lil Sew and Sew Machine ensures precise control over your sewing projects. The stitch length determines the distance between each stitch, while the width affects the zigzag stitch’s span. To adjust these settings, locate the control dials or digital interface on your machine. Refer to the manual for specific instructions, as settings may vary. For general sewing, a medium-length stitch (2.5-3mm) is ideal. For delicate fabrics, shorten the length, and for heavier materials, increase it. Similarly, narrow the width for tight curves or widen it for decorative effects. Always test adjustments on scrap fabric before sewing your final project.
Starting Your First Sewing Project

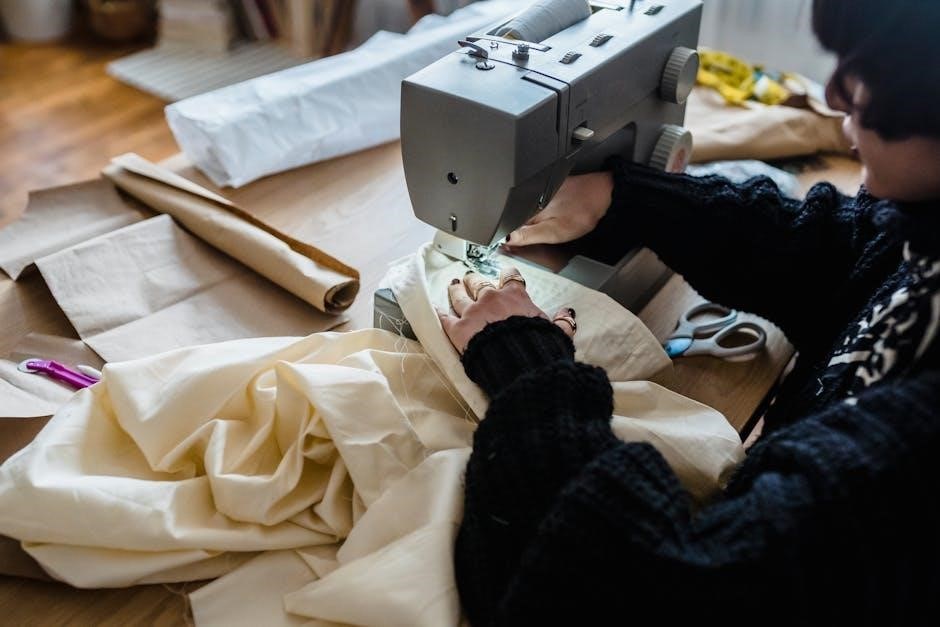
Starting your first sewing project with the Lil Sew and Sew Machine is an exciting milestone! Begin by gathering your fabric, thread, and any necessary notions like pins or scissors. Pre-wash and iron your fabric to ensure proper sizing and texture. Thread your machine according to the manual’s instructions, ensuring the bobbin is correctly installed. Select a simple stitch, such as the straight stitch, for your first project. Place your fabric under the presser foot, aligning the edge with the machine’s guide. Start sewing slowly, guiding the fabric smoothly. Practice on scrap fabric first to get a feel for the machine’s rhythm. Once confident, proceed with your project, enjoying the creative process of bringing your ideas to life!
Basic Troubleshooting Tips
Encountering issues while sewing? Start by checking thread tension and ensuring proper threading. If fabric isn’t moving, verify the presser foot is lowered. For uneven stitches, adjust stitch length or width. Thread breakage often occurs due to incorrect threading or using low-quality thread. Clean lint buildup regularly to prevent machine jamming. If the bobbin isn’t spinning, ensure it’s correctly installed and the machine is properly oiled. Consult the manual for specific solutions, and always turn off the machine before inspecting or fixing issues. Regular maintenance and following guidelines can help resolve most common problems, ensuring smooth sewing experiences.

Advanced Sewing Techniques
Explore advanced sewing techniques with the Lil Sew and Sew Machine, including working with jersey knits, mastering decorative stitches, and customizing projects for professional finishes.
Sewing with Jersey Knit Fabrics
Sewing with jersey knit fabrics can be a delightful experience with the Lil Sew and Sew Machine. Start by selecting the right needle, such as a ballpoint or stretch needle, to prevent fabric runs. Use a walking foot or Teflon foot for smooth fabric handling. Choose stretch stitches like the zigzag or overlock stitch to allow for fabric movement. Always pre-wash your fabric to ensure shrinkage and softness are accounted for. When cutting patterns, consider the fabric’s stretch direction for optimal fit. Use a longer stitch length for stability and avoid stretching the fabric while sewing. Finished seams can be reinforced with a serger or zigzag stitch. Regularly clean and oil your machine to maintain performance when working with knits.
Using Decorative Stitches
The Lil Sew and Sew Machine offers a variety of decorative stitches to enhance your sewing projects. Access these stitches by navigating through the stitch selection menu on the LCD screen. Choose from patterns like floral, scallop, and geometric designs to add a personal touch. For best results, use a stabilizing material like interfacing or water-soluble stabilizer, especially when sewing on delicate or stretchy fabrics. Adjust the stitch length and width to suit your fabric type, ensuring even and consistent stitching. Experiment with different thread colors to make your designs stand out; Always test the stitch on scrap fabric before sewing your final project to ensure proper tension and alignment.
Advanced Threading Techniques
Mastering advanced threading techniques ensures smooth operation of your Lil Sew and Sew Machine. Start by using the pull-through method to thread the machine, ensuring the thread passes through all tension discs and the take-up lever. For intricate stitching, utilize the self-threading needle feature to save time and reduce eye strain. Always guide the thread gently to avoid tangling or twisting. Experiment with decorative threads for unique stitch effects, but ensure they are compatible with your machine. Regularly check for thread breakage and trim loose ends to maintain even tension. For precision, use a magnifying glass to thread small areas or delicate fabrics.
Customizing Your Sewing Projects
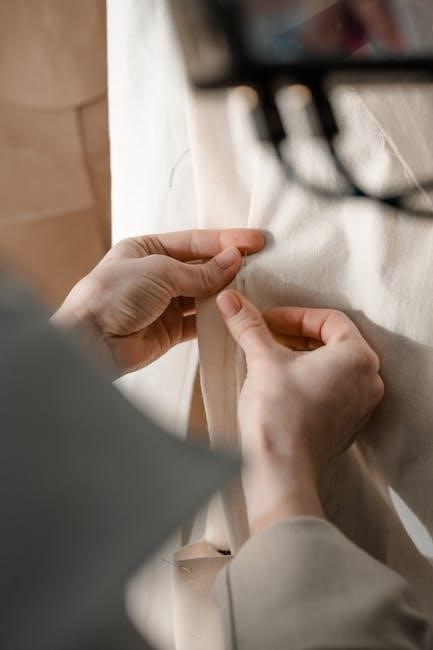
Customizing your sewing projects with the Lil Sew and Sew Machine allows you to add unique touches to your creations. Start by experimenting with decorative stitches to create intricate patterns on fabrics. Use custom embroidery settings to personalize garments or home decor items with names, dates, or designs. For a professional finish, incorporate buttonhole stitching for perfectly aligned buttons. Explore various fabric types, such as silk, cotton, or knit, to achieve different textures and effects. To enhance your designs, layer fabrics or add appliques for dimension. Don’t forget to utilize the machine’s built-in memory to save your favorite stitch combinations for future projects. With these techniques, you can transform simple sewing tasks into one-of-a-kind masterpieces.

Maintenance and Care
Regular maintenance ensures your Lil Sew and Sew Machine runs smoothly. Clean the machine, oil moving parts, and store it properly when not in use.
Cleaning the Machine
Cleaning your Lil Sew and Sew Machine is essential for maintaining its performance. Turn off and unplug the machine before starting. Use a soft, dry cloth to wipe down the exterior, removing any dust or debris. For the interior, gently brush away lint and thread fragments using a small, dry brush. Pay special attention to the bobbin area and feed dogs, as these areas tend to accumulate the most debris. Avoid using liquids or harsh chemicals, as they may damage the machine’s finish or internal components. For stubborn lint, a can of compressed air can be used cautiously; Regular cleaning ensures smooth operation and prevents thread breakage or jamming issues. Schedule cleaning after each project for optimal results.
Oiling the Machine
Regular oiling is crucial for the smooth operation of your Lil Sew and Sew Machine. Locate the oiling points, typically found near the bobbin area or outlined in your manual. Use high-quality sewing machine oil, applying a few drops to the specified areas. Turn the handwheel gently to distribute the oil evenly. Allow the machine to sit for a few minutes to let the oil penetrate moving parts. Excess oil can be wiped off with a clean cloth. Oiling prevents friction, reduces noise, and extends the machine’s lifespan. Perform this maintenance every 10 hours of use or as recommended. Neglecting to oil can lead to jams, slowed performance, or mechanical damage.
Storing the Machine Properly
Proper storage ensures your Lil Sew and Sew Machine remains in excellent condition when not in use. Always turn off and unplug the machine to prevent accidental start-ups. Use a soft, dry cloth to wipe away dust, lint, and any residual oil. Store the machine in its original carrying case or a protective cover to shield it from dust and moisture. Keep it in a cool, dry place away from direct sunlight, which can damage electrical components. Avoid storing it in attics, basements, or areas prone to humidity. If storing for an extended period, consider winding the bobbin and threading the machine to maintain tension. This practice prevents rust and ensures the machine is ready for use when needed.
Scheduling Professional Servicing
Regular professional servicing is essential to maintain the optimal performance of your Lil Sew and Sew Machine. Over time, wear and tear can affect its functionality, even with proper maintenance. It is recommended to schedule a professional service every 12 to 18 months or after completing large-scale projects. During servicing, a certified technician will clean internal mechanisms, lubricate moving parts, and check for any potential issues. This proactive approach prevents unexpected breakdowns and ensures your machine runs smoothly. Always refer to the warranty information for recommended service providers. Keeping track of service dates helps maintain the machine’s efficiency and extends its lifespan. Professional servicing is a crucial investment in preserving your sewing companion.
Troubleshooting Common Issues
This section addresses frequent problems like thread breakage, bobbin issues, and machine jams. Solutions include checking thread tension, cleaning lint, and rethreading properly for smooth operation.
Thread Breakage Solutions
Frequent thread breakage can be frustrating but is often easy to resolve. First, check the thread quality and ensure it’s suitable for your fabric. Old or low-quality thread may weaken and break easily. Next, inspect the needle for damage or dullness; a blunt needle can cause excessive friction, leading to thread breakage. Replace the needle if necessary. Also, verify that the thread is properly threaded through the machine’s tension discs and take-up lever. Incorrect threading can cause uneven tension, straining the thread. If issues persist, consult your manual for specific tension adjustments or consider using a thread conditioner to reduce friction.
Bobbin-Related Problems
Bobbin issues are common but easily fixable. If the bobbin isn’t seating properly, ensure it’s aligned correctly and the bobbin case is securely closed. Check for any lint or debris inside the bobbin area, as this can cause jams. If the bobbin thread isn’t picking up, verify that the take-up lever is in the correct position and the machine is threaded properly. Incorrect bobbin tension can also lead to poor stitching. Adjust the bobbin tension screw gently, ensuring it’s not too tight or loose. If problems persist, refer to the manual for specific guidance on resetting the bobbin or consult a professional for assistance. Regular cleaning can prevent many bobbin-related issues.
Machine Jamming Issues
Machine jamming can occur due to incorrect threading, tangled threads, or fabric bunching. If the machine jams, turn it off immediately to avoid damage. Gently remove the fabric and check for loose threads or debris in the needle area. Ensure the bobbin is properly seated and the take-up lever is in the correct position. If the issue persists, consult the manual for specific troubleshooting steps. Regular cleaning and proper threading can help prevent jams. Avoid forcing the fabric, as this can cause further issues. If jamming continues, consider consulting a professional or contacting customer support for assistance. Always follow the manufacturer’s guidelines for resolving such problems.
Tension Adjustment Tips
Proper tension is crucial for smooth sewing. Start by locating the tension dials, typically on the machine’s top or near the bobbin. Test stitches on scrap fabric to assess balance. If stitches are too tight, causing puckering, or too loose, risking seam integrity, adjust the dials slightly—clockwise to tighten, counterclockwise to loosen. Consider fabric type; thicker materials may need different settings. Avoid needle breakage by ensuring correct tension. For guidance, consult the manual or online tutorials specific to your Lil Sew and Sew model. Adjust in small increments, test each change, and be patient to achieve even stitches. Proper tension enhances both stitch quality and machine longevity.
Additional Resources
Explore online tutorials, community forums, and accessory guides for enhanced sewing experiences. These resources offer troubleshooting tips, project ideas, and expert advice tailored to your Lil Sew and Sew machine.
Online Tutorials and Guides
Enhance your sewing skills with online tutorials and guides specifically designed for the Lil Sew and Sew machine. These resources offer step-by-step instructions, video demonstrations, and tips for mastering various techniques. From basic operations like threading and bobbin installation to advanced methods such as decorative stitching, these guides provide comprehensive support. Many tutorials are created by experienced sewists, ensuring practical and actionable advice. Additionally, official and community-driven resources often include troubleshooting tips, project ideas, and customization options. Whether you’re a beginner or an advanced user, these online tools will help you unlock the full potential of your Lil Sew and Sew machine.
Community Forums and Support Groups
Join vibrant community forums and support groups dedicated to the Lil Sew and Sew machine. These platforms connect sewists of all skill levels, offering a space to share ideas, ask questions, and learn from experiences. Many groups feature tutorials, troubleshooting tips, and project showcases. Engage with fellow users to discover new techniques and gain insights into optimizing your machine’s performance. Additionally, these communities often host live Q&A sessions with experts and provide access to shared resources like custom stitch patterns and maintenance tips. Whether you’re tackling a complex project or seeking advice, these support groups foster a collaborative environment to enhance your sewing journey.
Recommended Accessories
Elevate your sewing experience with recommended accessories for the Lil Sew and Sew machine. Essential items include high-quality sewing needles, a variety of thread sets, and a precision seam ripper. Consider adding a walking foot for thick fabrics, a quilting extension table for larger projects, and a set of decorative presser feet. These accessories enhance functionality and versatility, allowing you to tackle diverse fabrics and techniques with confidence. Additionally, protective covers and storage cases ensure your machine stays in pristine condition. Explore compatible accessories to unlock the full potential of your Lil Sew and Sew machine and make every sewing project a success.
Warranty and Customer Support Information
Your Lil Sew and Sew machine is backed by a comprehensive warranty, ensuring protection against manufacturing defects. For detailed warranty terms, visit the official website or contact customer support. The dedicated support team is available to address inquiries, provide troubleshooting guidance, and assist with repairs. Online resources include FAQs, user manuals, and repair service locations. Register your machine to activate warranty benefits and gain access to exclusive support services. Whether you need technical assistance or maintenance advice, the Lil Sew and Sew customer support ensures a seamless ownership experience.